
Question
Import your invoices into QuickBooks
If you’re using spreadsheets to record invoices and wish to start using QuickBooks to track them going forward, you can import them into QuickBooks using our Import your Invoice functionality.
Before you start, make sure that your excel spreadsheets are ready and in a format that is accepted by QuickBooks. You can download a sample here. If your file includes details of customers and/or products, they can be added in QuickBooks automatically, so you don’t have to manually create them.
Things to look out for
- Invoices can be imported with multiple line items OR as a total value for each invoice. If no line item is present QuickBooks will populate this field with a generic item called 'Sales'.
- Multi-Currency is supported.
- Product categories are supported.
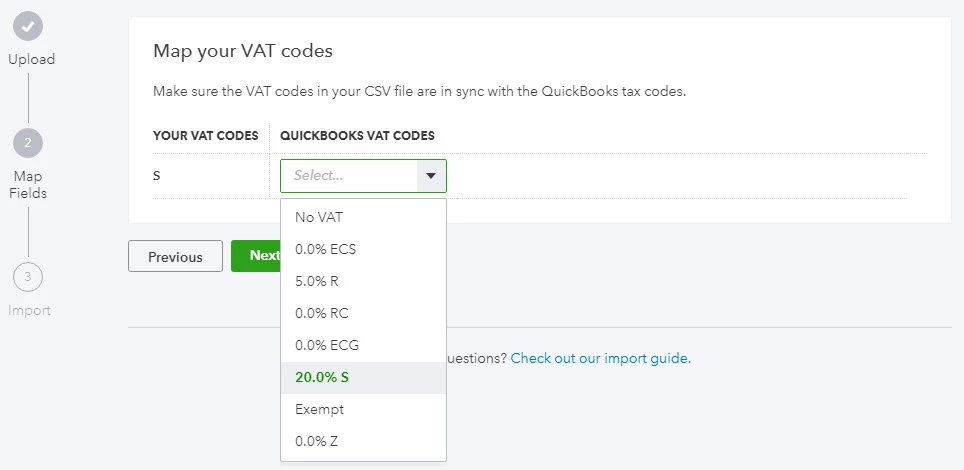
- VAT codes are mapped so there is no need to change your VAT codes to QuickBooks VAT code formats before importing.
- We recommend that no more than 100 invoices are imported at any one time.
- When new customers are imported, if no currency is specified QuickBooks assumes the customers home currency is GBP.
- To import line items with Product Categories, enter the category with a colon separator between the product/service (e.g. category:Product/service).
- When invoices have multiple line items please ensure the first line entry specifies the invoice number, customer, Invoice Date etc, line items 2 onwards, of the same invoice number only require the invoice number as seen in the example csv file, specifically invoice 1001.
- To retain invoice numbering in your csv file, please ensure Custom Transaction Numbers is switched ON
- Select the Gear icon at the top, then Account and Settings.
- Select Sales tab, navigate to the Sales Form Content.
- Click on the edit icon and change Custom Transaction Numbers from Off to On using the check box and select Save.
When you are ready
- Select the Gear icon at the top.
- Under Tools, choose Import Data.
- From the list, select Invoices or Bills.
- Select the Browse button.
- Select your Excel file, click Open then select Next to continue.
- If you would like QuickBooks to auto create contacts and/or product/service items then select the applicable option(s) and select Next.
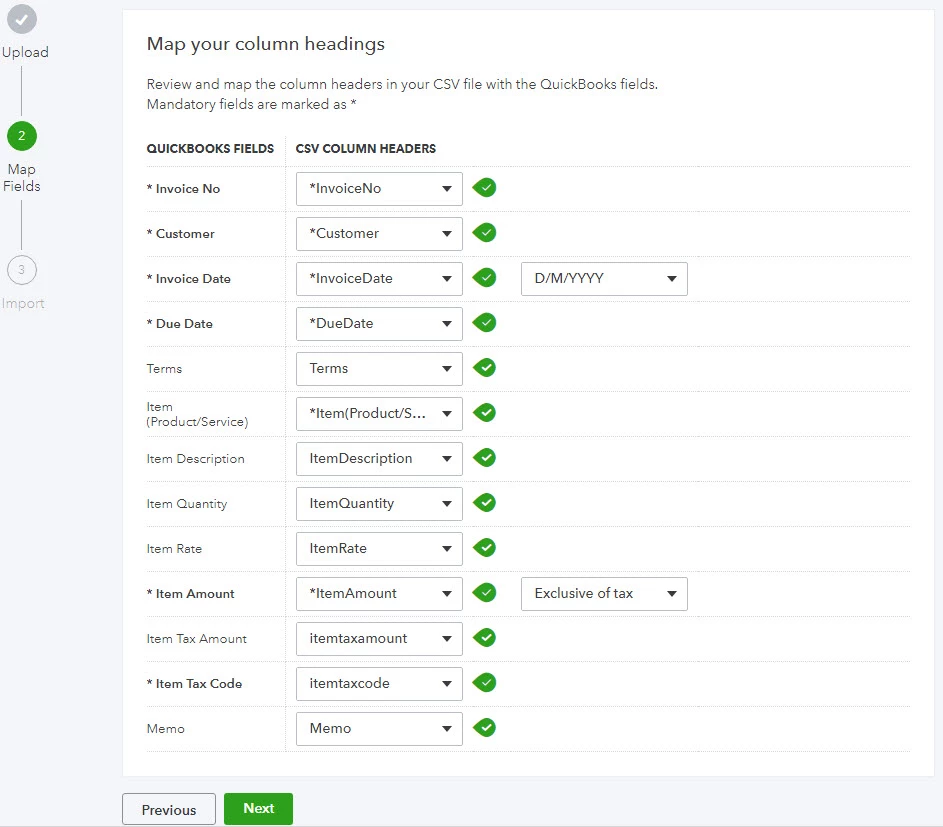
- Map the headers in your Excel file to the fields in QuickBooks, then click Next.
- If you are VAT registered, map your VAT codes to those of QuickBooks, then select Next.
- You’ll now see a summary of your import. Adjust your data if necessary then select Import.