
Getting Started with QuickBooks Payments
Thanks for choosing QuickBooks Payments to manage your business! We put together a few steps to help you get started, send your first invoice, and get paid faster.
Integrated invoicing and cash flow management are just a couple ways you can accept payments from your customers. Let's get started.

Please note, QuickBooks customers must apply for QuickBooks Payments and be approved before they can begin to use the service. For more information, review the Intuit Merchant Agreement, privacy policy, and pricing documents here.
|
Setting up for success
First things first: To take automated payments and send electronic invoices, set up your payments information. We put together a list of a few things you will need to get set up.
Choose where to record payments and processing fees for QuickBooks Payments
Company settings
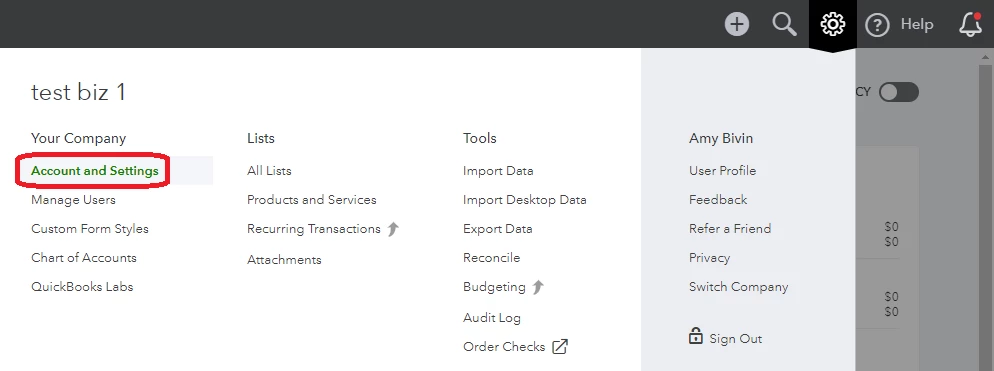
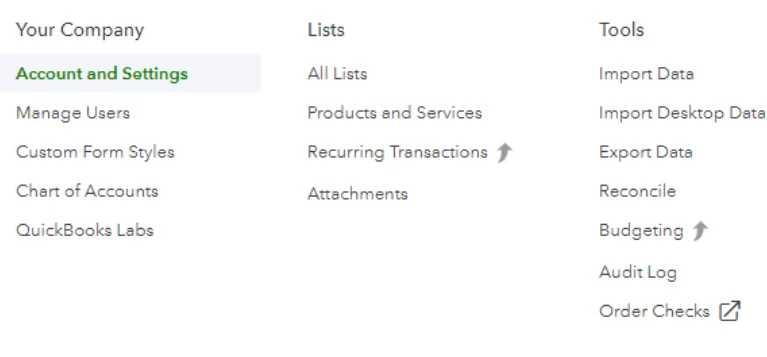
First, start by signing into your QuickBooks account. Select the Settings (Gear) icon.

Select Account and Settings from the pop-up menu.
Next, review your company info for accuracy. This is what your customers will see on any invoices, credit card charges, or emails sent through QuickBooks Payments on your company’s behalf. Select the Payments tab located on the left side menu and fill out the following information:
Business
- Business type
- Contact email
- Legal business name
- Federal Tax ID (EIN)
- Website
- Address
- Phone
- Industry categories
- Select how much you think you will process monthly using payments.
Owner/Proprietor
- Name
- Address
- Phone
- Date of birth
- Mobile phone number
- Last 4 digits of Social Security number
Bank
- Routing number
- Account number
Once you have completed the forms, select Accept and Submit.

Note: if you have not set up Payments yet, simply click on the Learn More button and the Finish Setup button on the next screen. |
Create and send an invoice
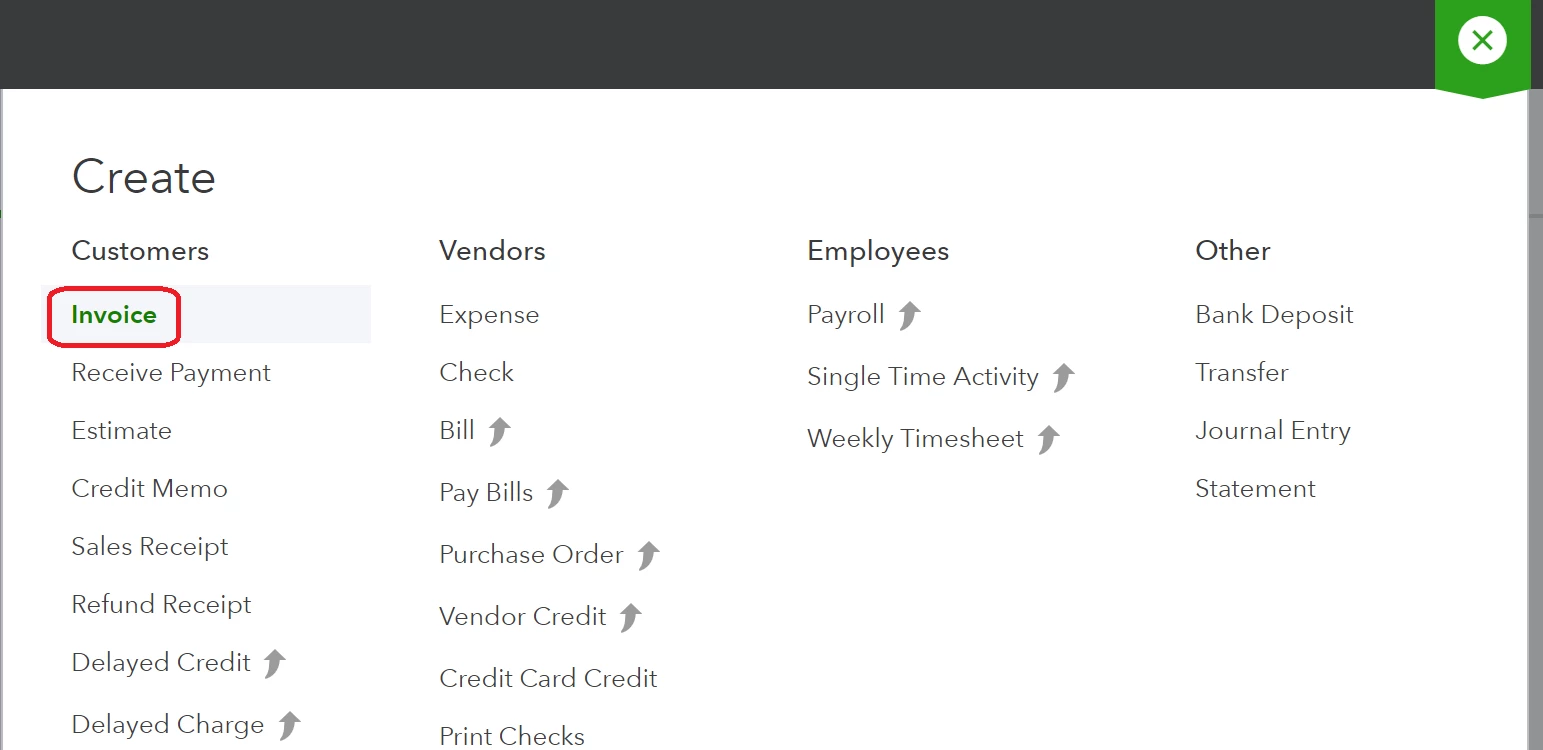
Once Payments is set up and your account is approved, you will be ready to process and send your first invoice. Begin by selecting the (+) plus sign from the top menu, then select Invoice.
Fill out your customer’s information or choose it from the drop down, if you’ve already entered their information. When you’re creating your invoice, be sure to select the types of payments you’ll accept.
Then select Save and Send to email the invoice to your customer.
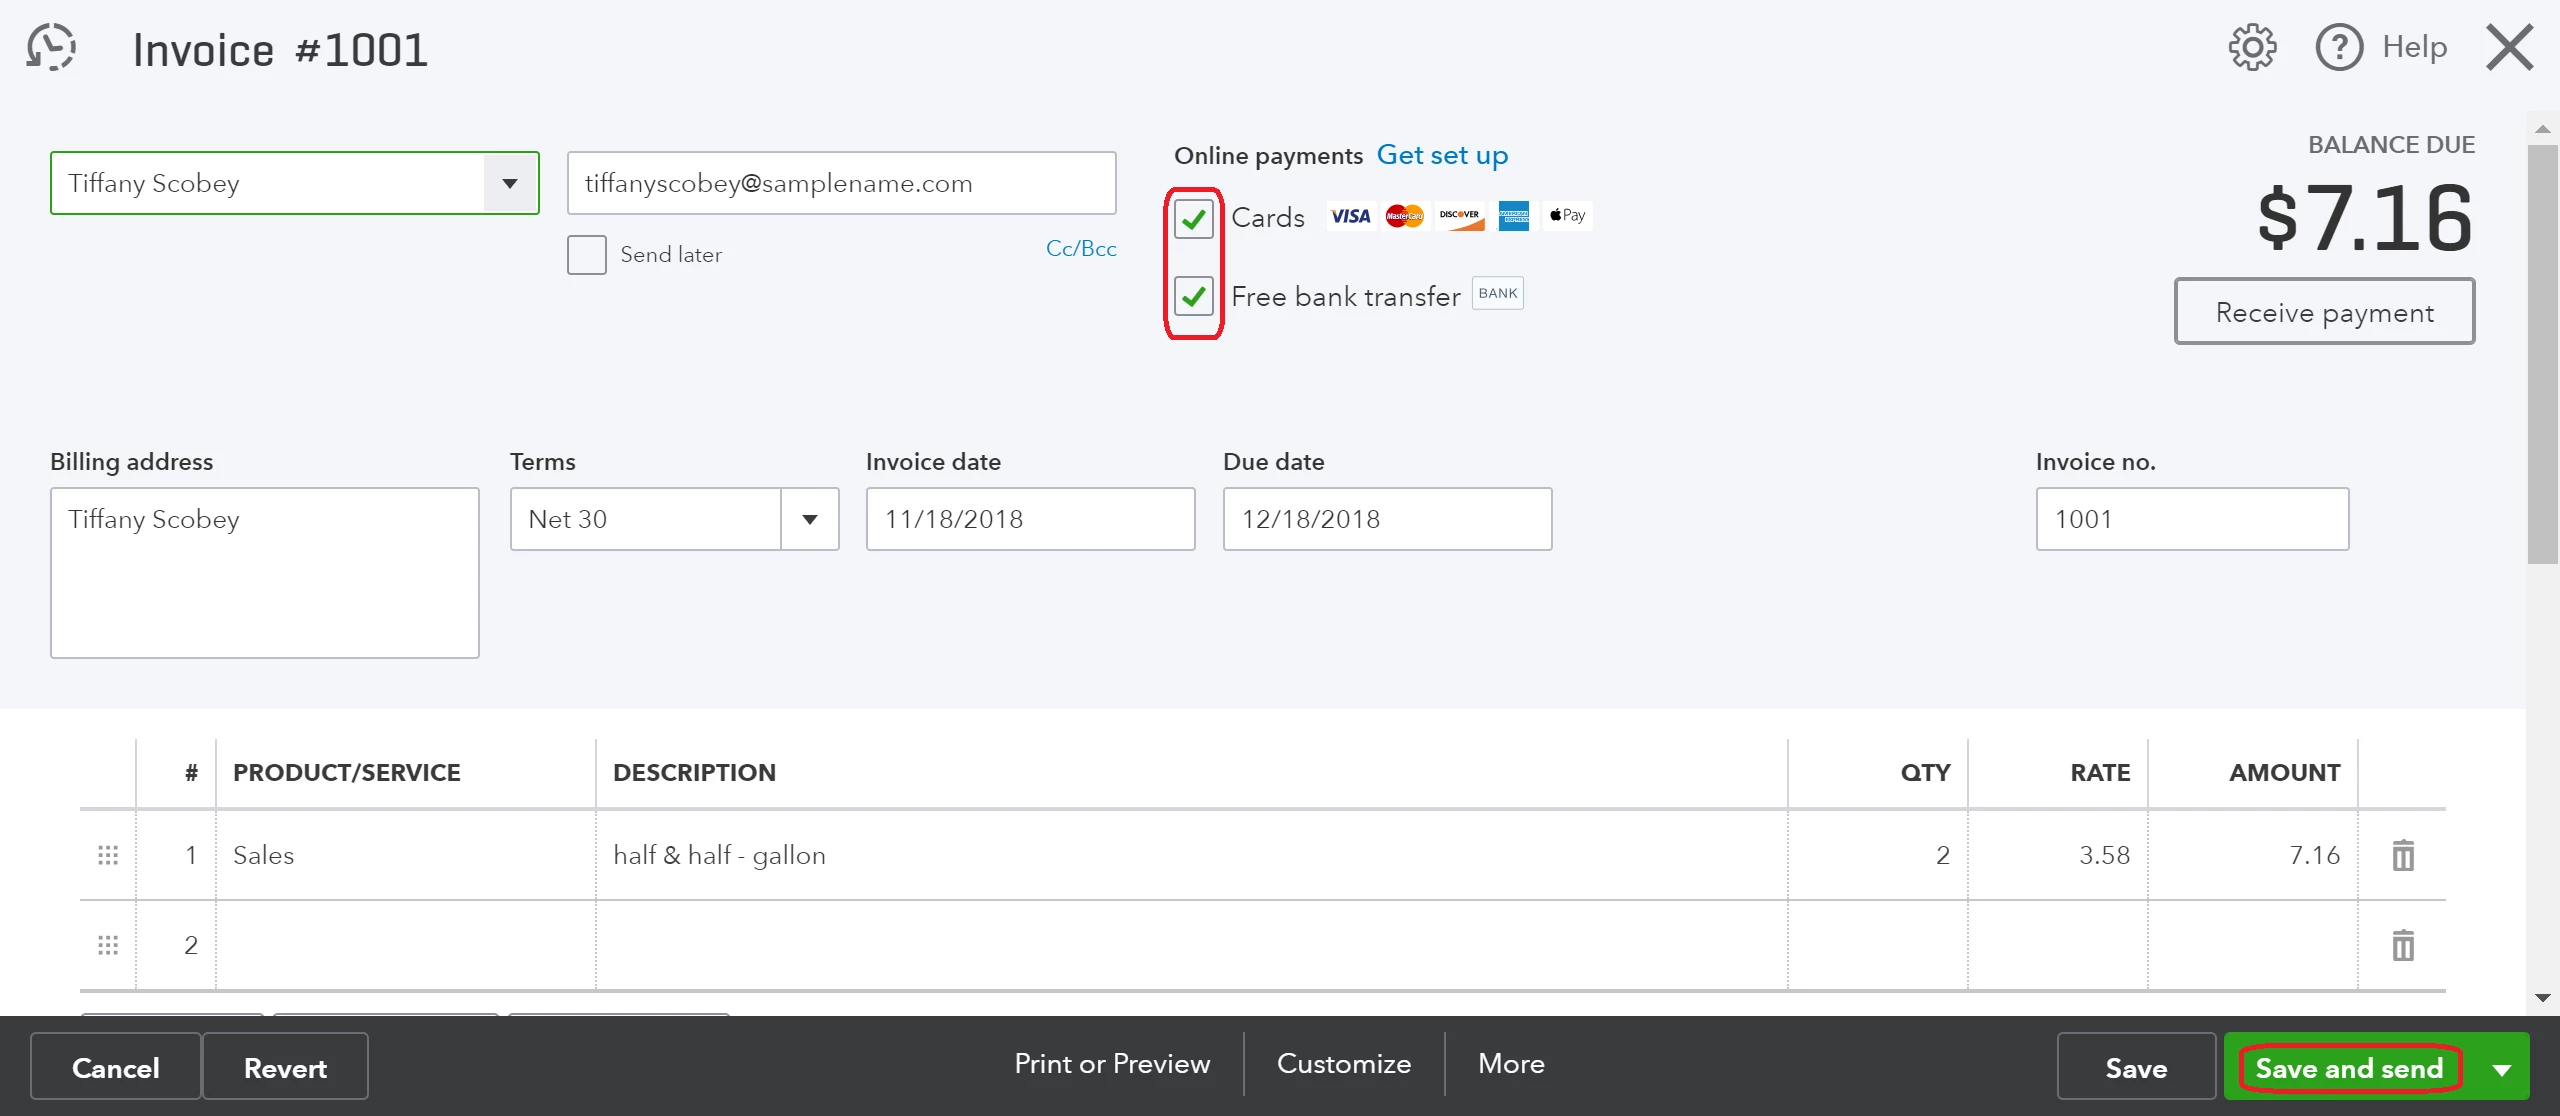
Congratulations! You have just sent your first trackable invoice with a Pay now button so your customers can pay you securely online through card or bank transfer. You’ll be able to see when your invoice is sent, viewed, and paid through QuickBooks Payments.
Once your invoice has been paid, money will be in your bank account in 2-3 business days for credit and debit cards and up to 5-7 business days for bank transfers.

Note: Stay tuned for more options with QuickBooks Payments to help you get paid faster! |
Choose where to record payments and processing fees for QuickBooks Payments
QuickBooks Payments automatically records your deposits, so it is important to make sure that your payments and processing fees will be recorded to the correct accounts.
- Select the Settings icon, then Account and Settings.

- Select Payments from the left menu.
- In the Chart of Accounts section, select the pencil (edit) icon.
- For Where do you want to record payments? Choose the correct bank account.
- For Where do you want to record processing fees? Choose the proper expense account for tracking processing fees.
- Select Save.
What’s Next?