
Top 5- Payments

Hello Community! We are back with another Top 5, but this time around we will be discussing questions on the topic of Payments. If you’re looking to know more about what an ACH fee is, how you can set up an ACH payment, how to refund a customer on an overpayment & more, then you’re in the right place.
So let’s go ahead and dive into these questions!
What is a QuickBooks ACH fee??
I’m glad you asked! I'm happy to share some information with you about ACH payments or processing fees in QuickBooks Online.
If you use QuickBooks Payments to take payments, there's a fee each time you process a transaction. It varies depending on whether the card is swiped (2.4%), invoiced (2.9%), or keyed (3.4%). ACH payments have a charge of a 1% fee (max $10) on each transaction.
For more information, feel free to check out this article: What are the fees for QuickBooks Payments?
Furthermore, if you want to know when QuickBooks deposits customer payments into your bank account, please visit these articles:
How can I set up an online ACH payment?
You're in the right place! I'm here to share some insights about paying bills online with QuickBooks.
You can pay your bills via ACH directly and hassle-free using Online Bill Pay. QuickBooks Online (QBO) works together with Online Bill Pay to let you:
- Pay bills electronically within QuickBooks Online.
- Pay vendor bills directly from within QuickBooks Online with ACH (bank transfer) or a paper check.
- Record payment transactions accurately and automatically in QuickBooks Online
To get started, you need to sign up for Online Bill Pay by following these steps:
- Open QuickBooks, then go to the Apps menu.
- In the search field, search Bill Pay.
- Select Bill Pay for the QuickBooks Online app card.
- In the app card, you'll notice two buttons. Select Get Bill Pay.
- Once on the Learn More page for Online Bill Pay, select Get Started.
- Enter your company information, then Next.
- Now, follow the prompts to connect your bank account, then hit Next.
- Enter your personal information, then Next.
- Lastly, answer a few identity check questions. If you have issues with this process or are declined during the identity check process, contact Intuit's Care Support.
Note: Although there is no monthly subscription fee for this service, you will be charged a transaction fee for each payment you process.
Here are some more resources you can check out on this topic:
Now you’re set!
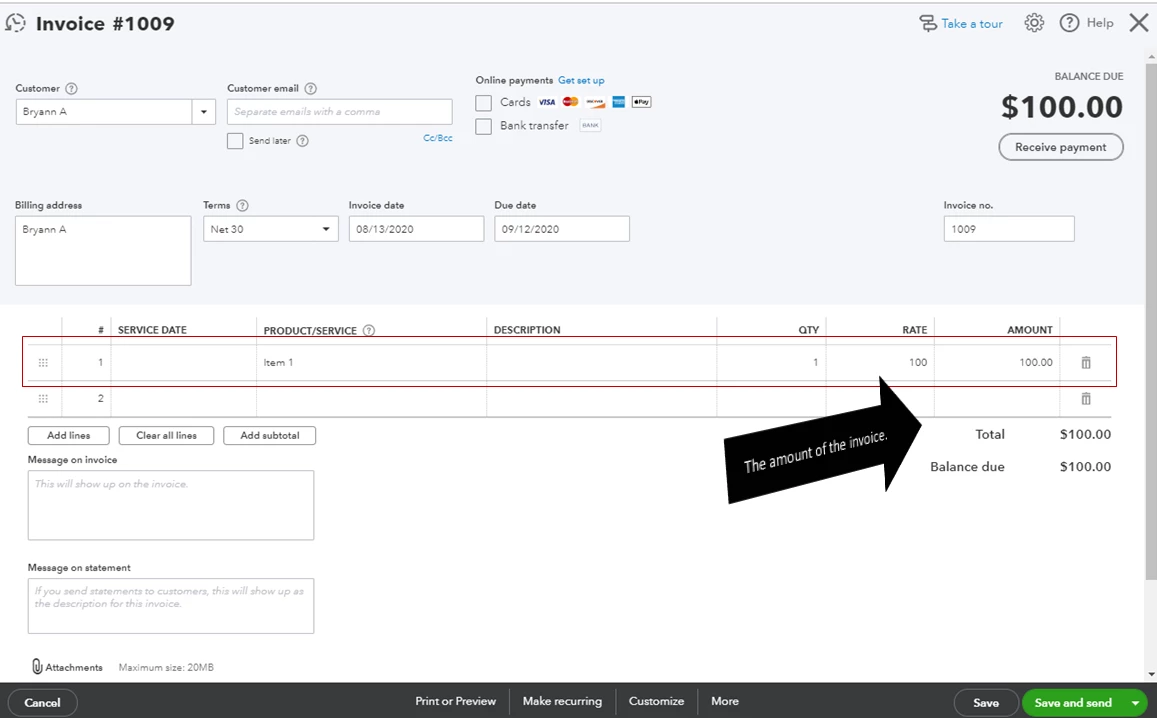
How do I refund a customer on an overpayment?
Great question! I'm here to guide you on how to record these transactions in QuickBooks Online.
First, you need to issue a check to your customer using the Accounts Receivable account for the overpayment amount. Then, create a payment and select the check recorded and the existing credits.
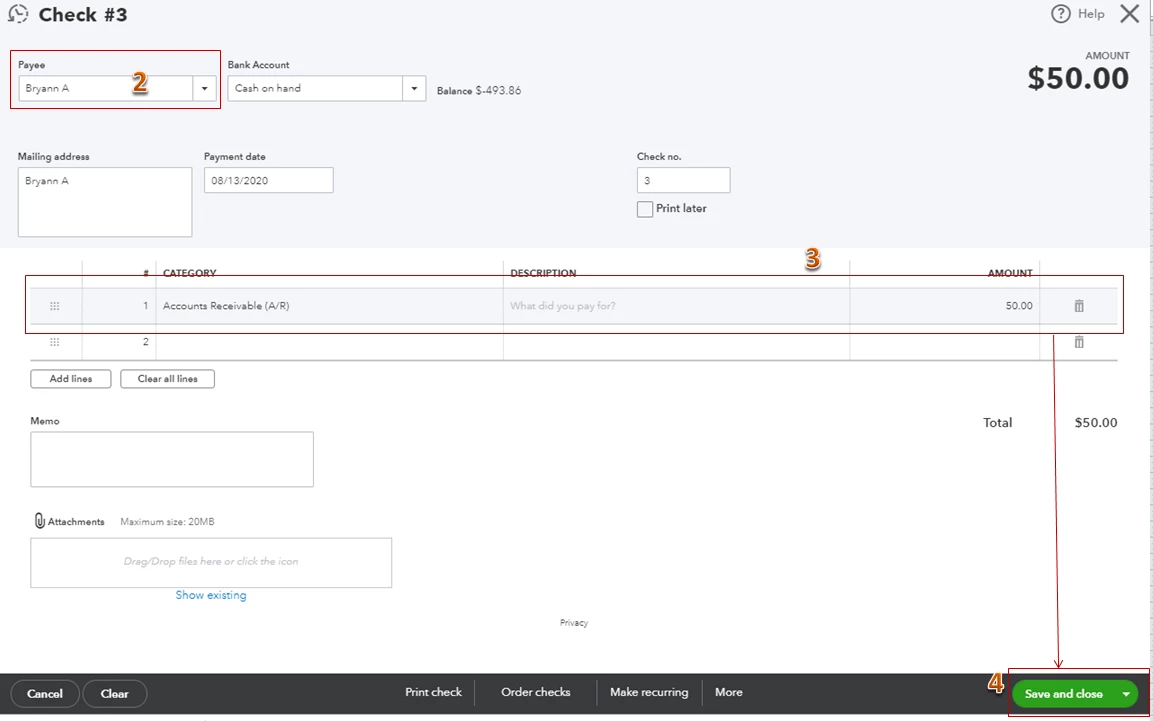
Here's how to enter the check:
- Open your QBO account, then select Check from the New (+) icon.
- Pick the customer's name under the Payee section.
- Under Category select Accounts Receivable, then enter the overpaid amount.
- Save the check.

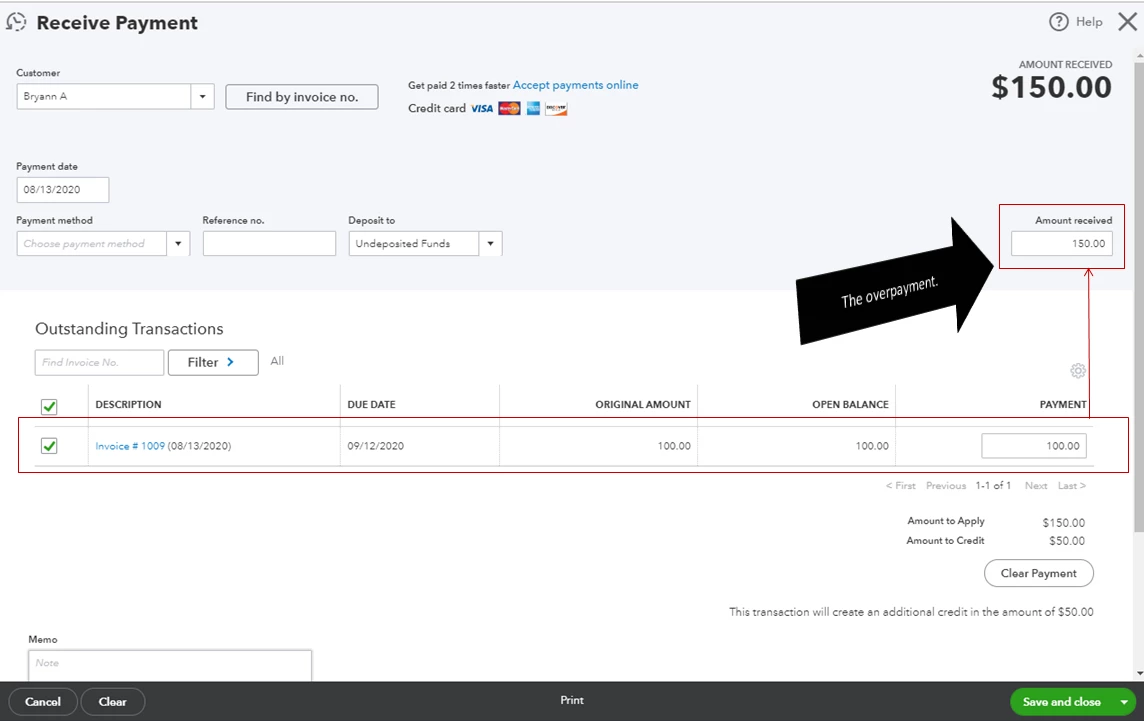
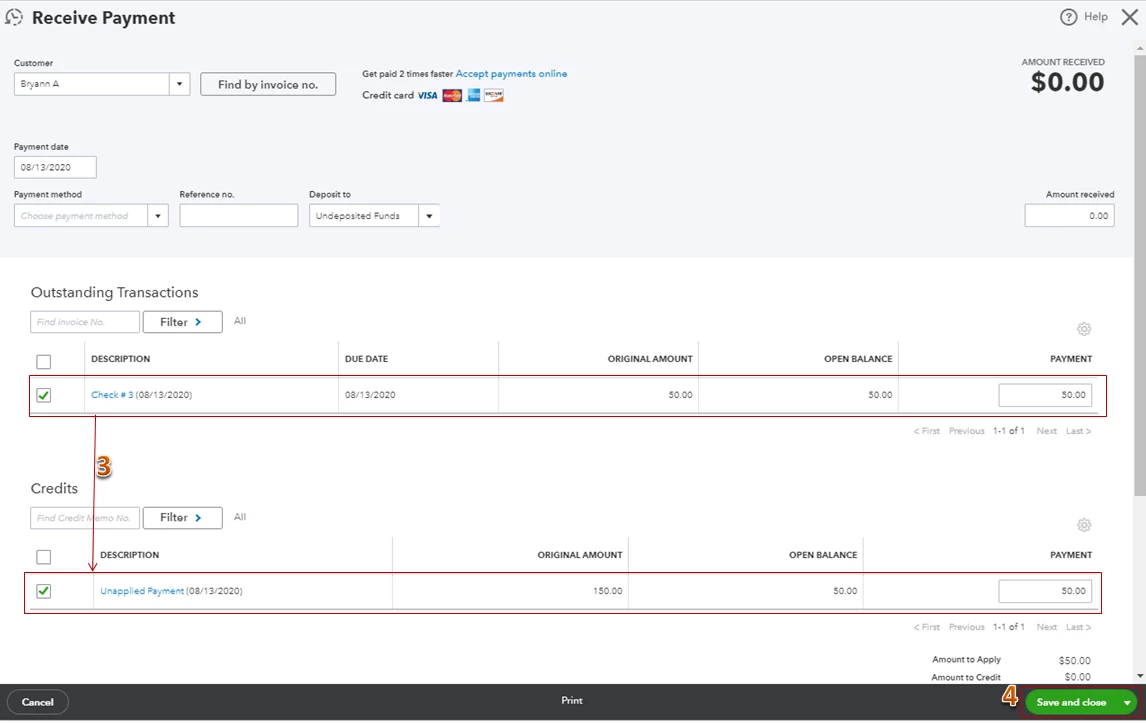
Once completed, follow these steps to link the check and the unapplied amount.
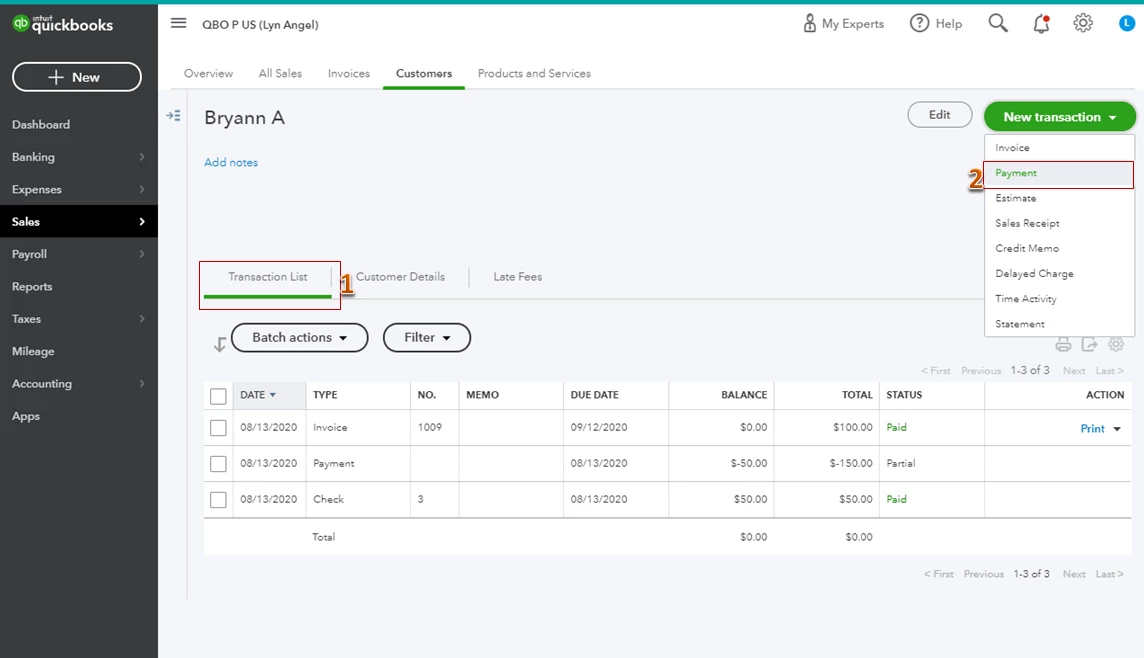
- Open your customer's transaction list.
- Click on the drop-down arrow under New transaction and choose Payment.
- On the Receive Payment window, select the check under the Outstanding Transactions section and the Unapplied Payment under the Credits.
- Hit Save and close.
You can also check this article for other tips on how to handle a customer credit or overpayment in QBO.
You’re now good to go!
How do I record a returned payment?
Let’s look at how you can go about recording the returned payment!
When you enter a returned payment for a business expense or canceled project, you can record the fund by linking a bank deposit to a vendor credit. If you have created a bill, make sure that you added the bill and paid it properly. This way, you can have accurate vendor expenses and credits.
Once done, you can enter a vendor credit to ensure that the credit hits the expense account you use for that vendor. Let me show you how:
- Click the + New button and then select Vendor credit.
- In the Vendor drop-down, pick the vendor.
- Enter the category, product, or service that valued the returned payments.

- Click Save and close.
Then, you'll have to deposit the money you got from the refund back to the account you use for the payment:
- Click the + New button.
- Select Bank Deposit.
- In the Account drop-down, choose the account where you want to deposit the money.
- Go to the Add funds to this deposit section and select the vendor who gave you the refund. Also, add the wire fee charged (amount is in minus to negate the total returned payments).
- Choose Accounts Payable from the Accounts column.
- Enter the amount of your refund.
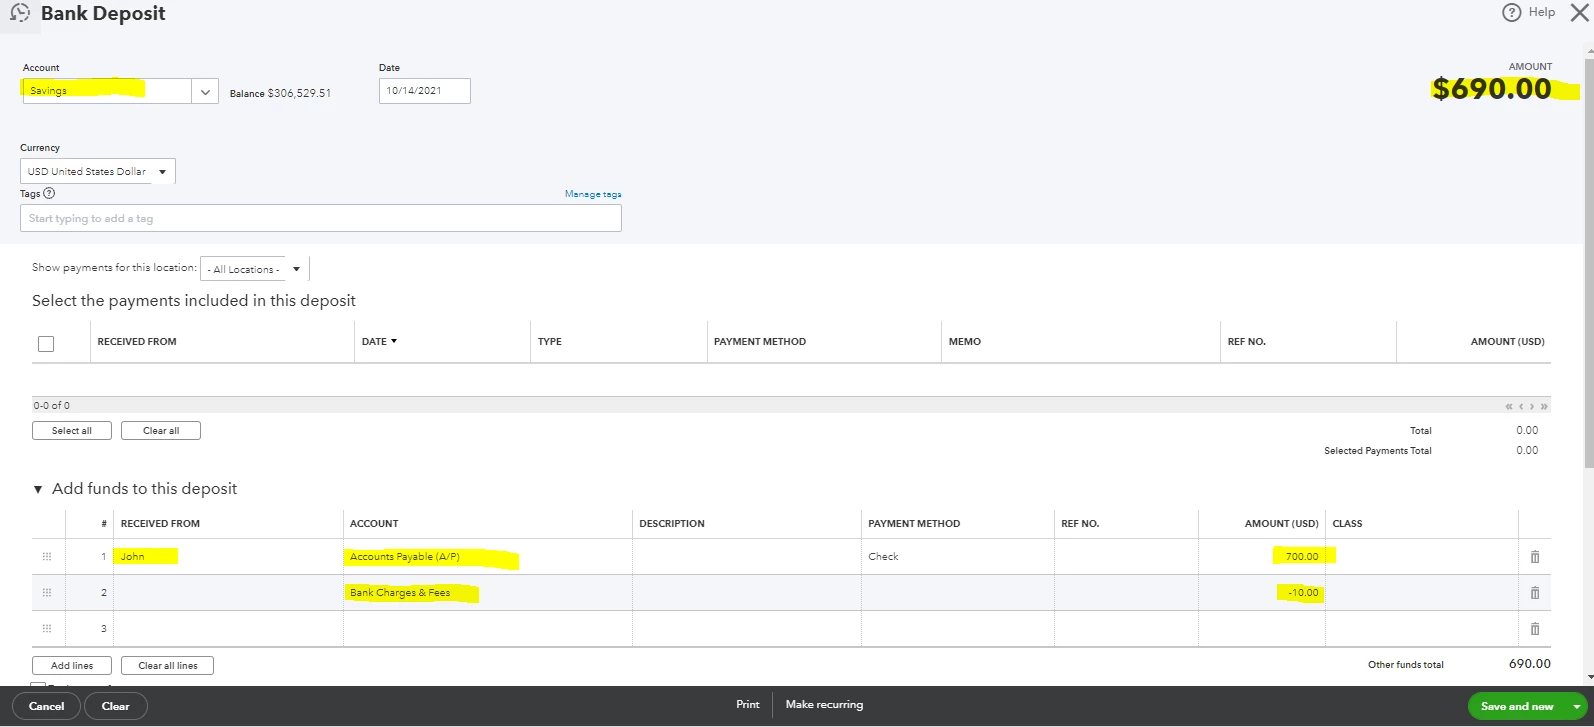
- Click Save and close.
Lastly, link the bank deposit to the vendor credit using the Pay Bills option:
- Click the + New button.
- Choose Pay Bills.
- Select the bank deposit you just created. (The amount of the vendor credit will show in the Credit Applied field, and the Total payment should be $0.00.)
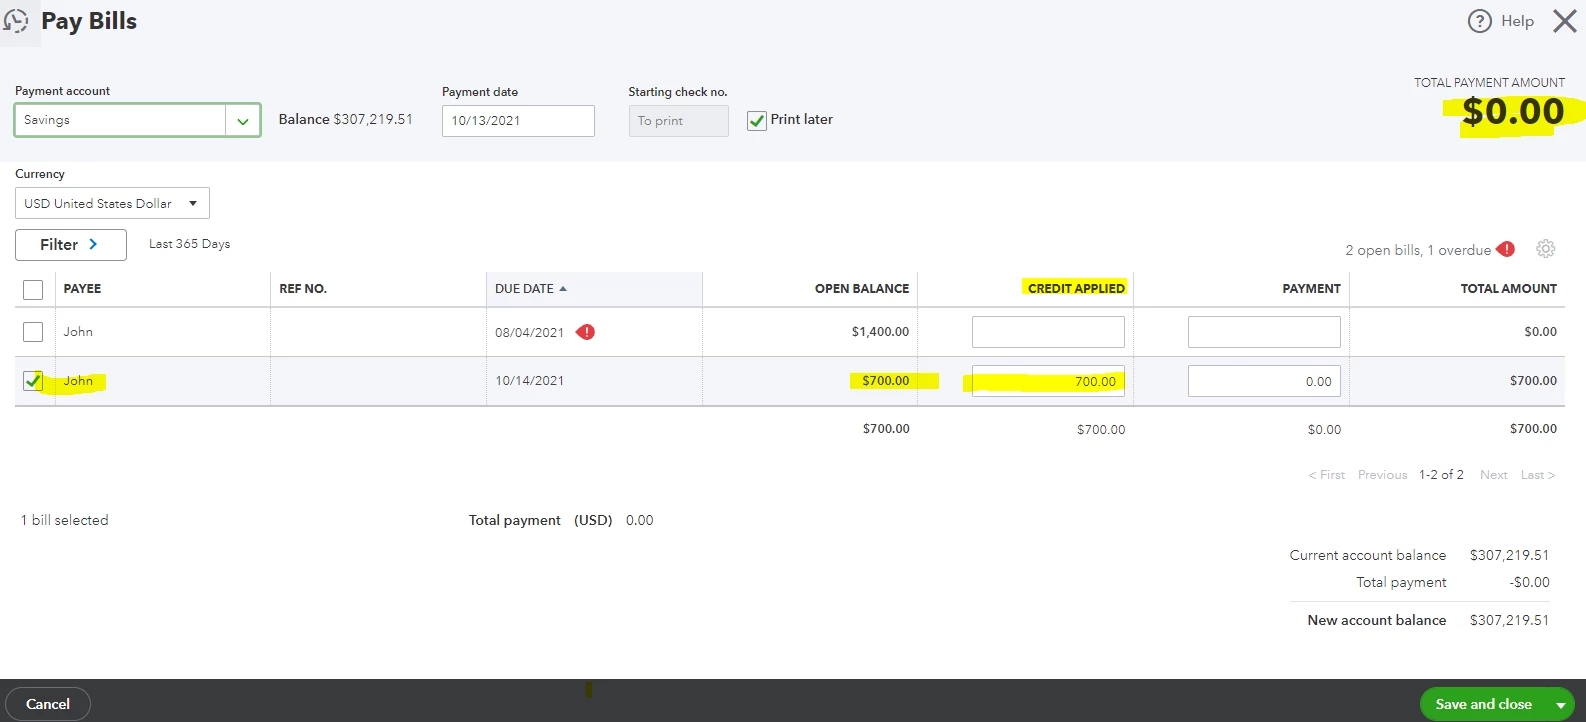
- To complete the process, click Save and close.
I've also included additional information about handling vendor credits and refunds in QuickBooks Online: Manage vendor credits.
If you have recorded expense transactions in error, you can edit or delete them anytime.
That's it!
How do I enter credit card charges?
Great question! In QuickBooks Online, you can enter your credit card charges as Expenses. From there, you can select a category so you can post the amount individually.
I'll show you how.
- Go to the + New icon and then choose Expense.
- Choose the credit card account under the Payment account drop-down menu.
- Select the credit card type under the Payment method drop-down list.
- Fill in the other necessary information.
- Once done, click on Save and Close.
For more help and resources, check out this article: Enter and Manage Expenses.
I also recommend reconciling your account in QuickBooks. This ensures your bank and credit card statements always match.
You should now be set!
That’s all I have for you today! I hope you found these top 5 questions on Payments helpful, but as always, feel free to reach out to us with any other questions or concerns you may have.
See you next time!