
Top 5- Reports & Accounting

Happy September! Welcome back to another Top 5 questions here in the Community. We hope these have been helpful for you as today we have another round of top questions asked that you won’t want to miss.
If you’ve been running into some roadblocks when it comes to running reports or simply want to learn more in regards to reporting and accounting within your QuickBooks Online account, then this one is for you.
Let’s go ahead and dive in!
1. How do I run a report that will show all payments received during a certain time period for a few select accounts?
Thanks for asking! You can do this easily by running a Transaction List by Customer Report. This report displays all the transactions and subtotals of income and expenses per customer.
Let me show you how you can go about customizing this report.
Here’s how:
- Select Reports from the top menu bar.
- Choose Customers & Receivables, then select Transaction List by Customer.
- Click the Customize Report button.
- In the Display tab, set the appropriate reporting date under the REPORT DATE RANGE section.
- In the Filters tab, select Transaction Type from the FILTER menu.
- Choose Multiple Transaction Types from the Transaction Type drop-down menu.
- From the pop-up window, select Invoice and Payment then click OK.
- Hit OK again to complete the process.
You can double-click the payments to know which invoice it was linked to.
That’s all there is to it!
For more resources, you can also check out this article that will help in tracking how your business is doing: Customize company and financial reports.
2. How do I restore invoices that were accidentally deleted in my QuickBooks Self-Employed account?
Great question! As of right now, there’s no option to automatically restore a deleted transaction in QuickBooks Self-Employed. However, you can recreate the invoice using the data in your Audit Log report.
Here's how you can go about doing so:
- Click the Gear icon and select Audit log.
- Go to Filter and select Show only these events, Transactions, and Deleted/Voided transactions.
- Click Apply.
- Look for the deleted invoice and click View under the History column to get all the details that you need.
- Once you’re done, click the + New button and select Invoice. Then, enter all the details and click Save.
You’re all set!
Make sure to check out this article for more details on this process: Use The Audit Log To Re-enter Deleted Transactions.
You'll also want to run the Invoices and Received Payments report. This will let you review all the invoices and the payments that are applied to them. Just go to the Reports menu and type in the name of the report in the Search bar.
3. Can I import my bank statements into QuickBooks online?
Yes! You can do this easily within your account so let’s take a look at how.
If you're using QuickBooks Online Plus, Advanced, Accountant, and QuickBooks Live, you can take advantage of being able to get bank statements directly from your bank when you reconcile.
If you're using QuickBooks Online Simple Start and Essentials, you'll want to manually upload your bank entries into QBO.
You can follow these steps:
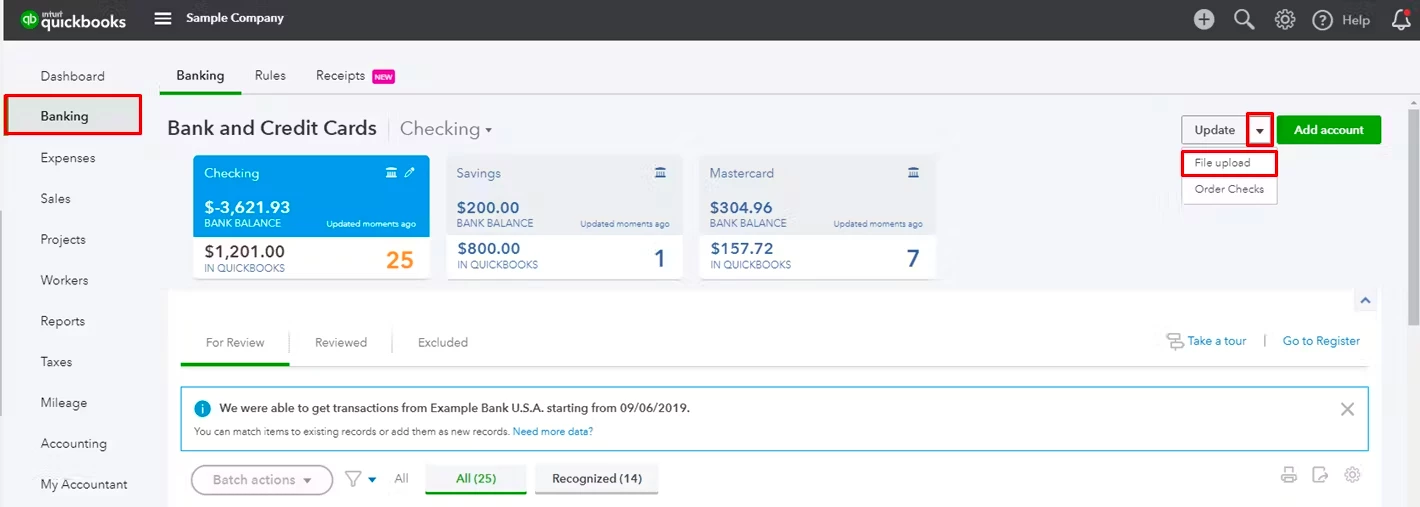
- Start by clicking Banking from the left navigation panel.
- Pick File Upload from the Update drop-down menu or Upload transactions manually if there isn’t any bank connected to QBO.
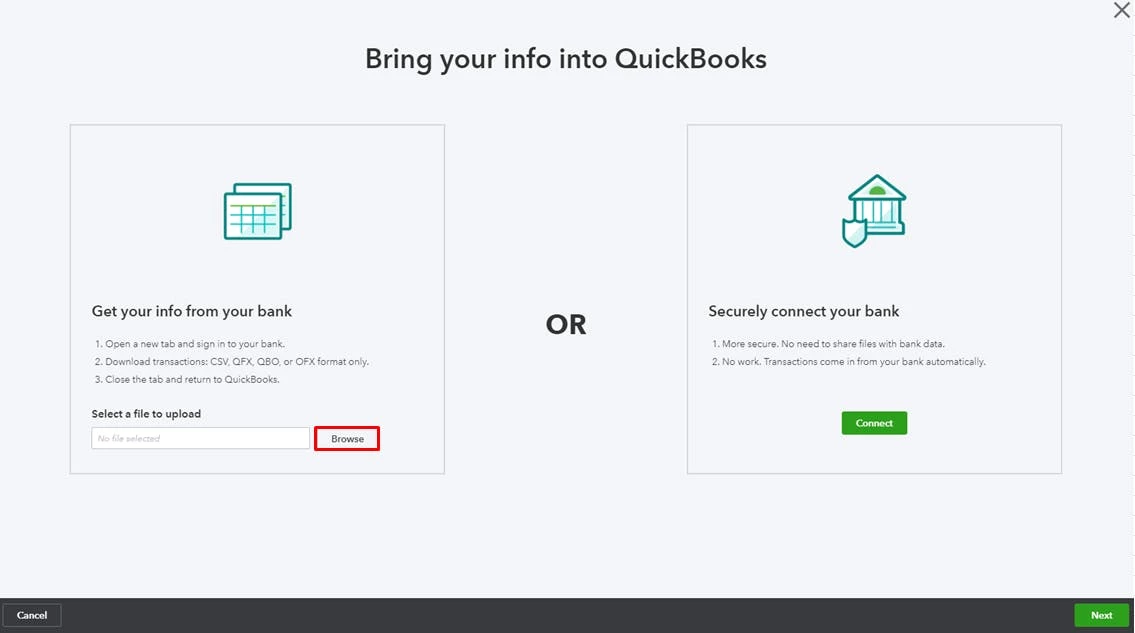
- Select Browse and choose the file you downloaded.
- Choose an account from the list, then Next.
- Follow the on-screen instructions to map the fields.
- Select the transactions to import.
- Click Yes.
- Hit Let’s Go.
And that should do it!
For more info on and steps on importing these files manually, make sure to check out this article: Manually upload transactions into QuickBooks Online.
4. How do I pull a sales report by state in QuickBooks Online?
I’m glad you asked! Let’s go over how.
To achieve this task, you'll have to run the Sales by Location Detail report and set your desired date in the Report period field. This way, you'll be able to pull up the information you're looking for in your report.
Note: Before you start, let's make sure the Track Location setting is turned on. This is to ensure you're able to track your transactions by state in your report. Also, this enables you to specify the location every time you create a transaction like an invoice, sales receipt, etc.
If you haven't already, you can follow these steps to do so:
- Go to Settings ⚙, then choose Account and Settings.
- Tap Advanced.
- Pick the Edit ✎ icon in the Categories section.
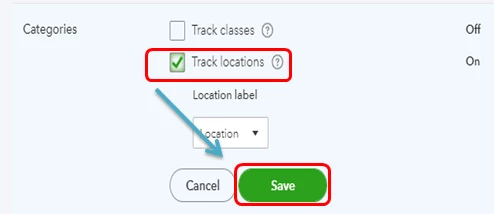
- Select the checkbox to track locations.
- Hit Save, then Done.
Next, you'll have to add the location you want to track and reflect in your report. Here's how:
- Let's go again to Settings ⚙️, then pick All Lists.
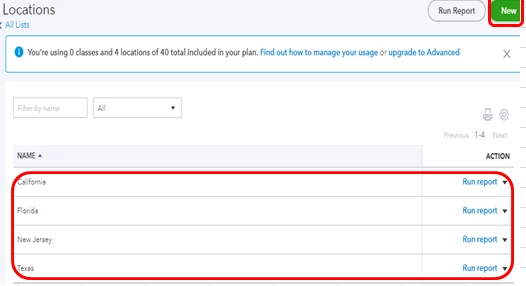
- Select Locations.
- Tap New, then add the Name of the location you want to track.
- Hit Save and Close to confirm the action.

Feel free to read this article for more information about the steps provided above: How to track location in QuickBooks Online?.
Once you’re done, you're all set to run the Sales by Location Detail report by doing the following:
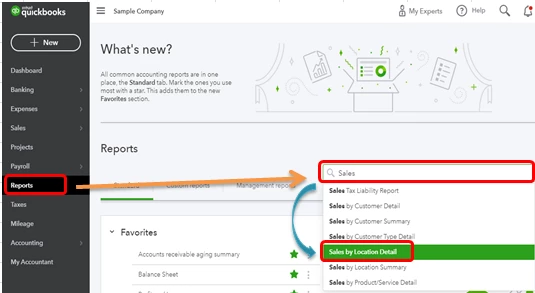
- Go to the Reports menu on the left pane.
- Look for and type Sales by Location Detail in the search box.
- Pick a Report period, Group by Location, and Accounting method.
- Hit Run Report to display the desired info for this report.

You should now be good to go!
5. How do I clear out an accounts receivable that isn't linking up?
The most efficient way to clear any accounts receivable in QuickBooks Online is to create a Journal Entry and then reverse it. Please, enter a date of the end of the time period, and set it to reverse on the following day. But before doing this, it would still be best to consult with your accountant to make sure what's best for you and your business.
Here's how:
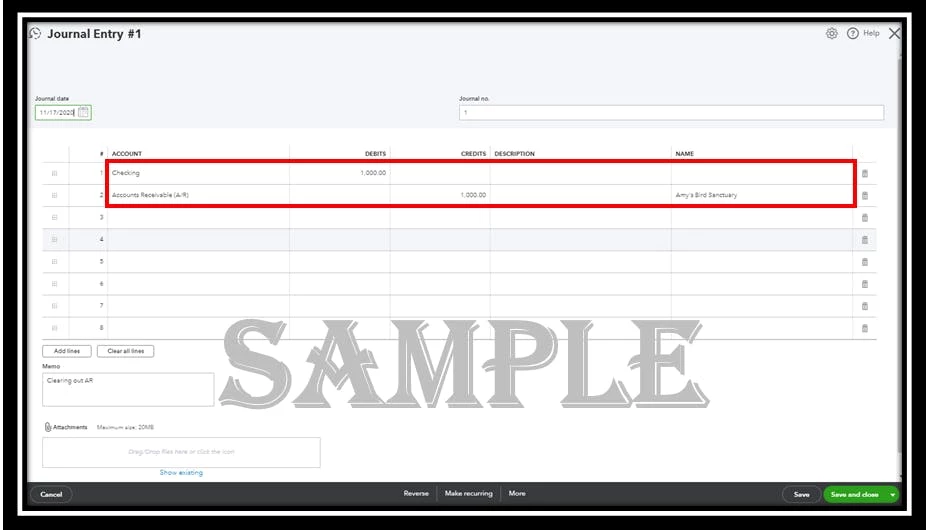
- Go to the Plus (+) icon, then select Journal entry under Other.
- Enter the Journal Date.
- Under the Account drop-down, choose the account affected by the transactions, then enter the amount in the Debit column.
- On the second line, add the Accounts Receivable.
- Select the customer's name in the drop-down.
- Leave a reason in the Memo field.
- Tap on Save or Save and close button to record the transaction.
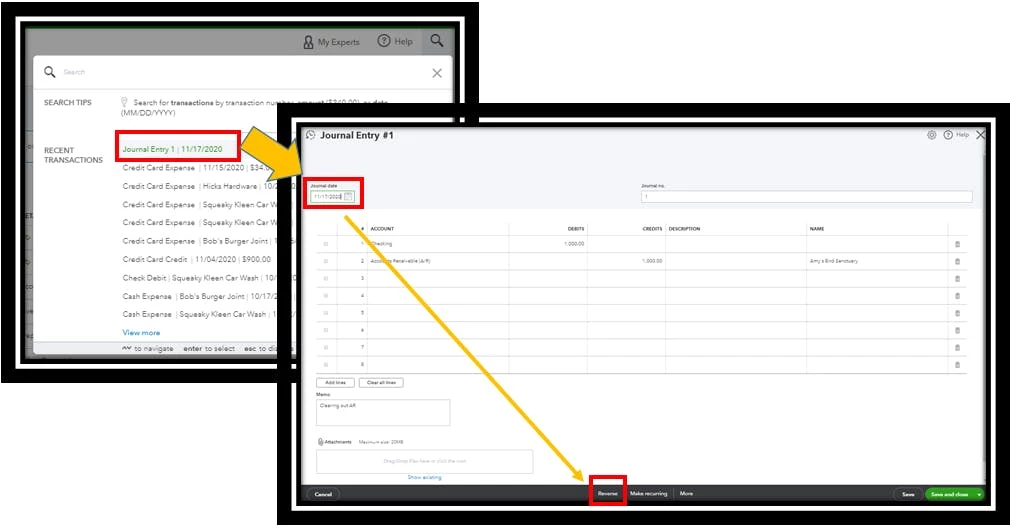
After that, you can now reverse it by following the steps below:
- Select the Search icon on the toolbar.
- Find the journal entry you created and open it.
- Elect Reverse.
- Change the Journal Date to one day after the original journal entry's Journal Date.
- Tap Save and Close.
Now you can apply the JE to the existing balance. For detailed information, check out this article: Resolve A/R or A/P balances on a cash basis Balance Sheet.
Note: You can always access the Balance Sheet Report to review the balance in AR by going to the Reports tab. Then select the amount listed for the Accounts Receivable account and customize it to show the specific details.
That’s all we have for you today. If you have any other pressing questions regarding reports and accounting, please feel free to let us know in the comment section below!
See you next time!