Adding new columns for vendor lists is a breeze, @MelindaCA!
Follow along below to get this done right away. To start, let's first create a column for Website Address on your Vendor Center page. Here's how:
- Navigate to the Vendors menu and choose Vendor Center.
- Double-click any profile to edit the list.
- Select the Additional Info tab and then hit Define Fields.
- In the Label column, enter Website Address.
- Tick the column under Vendor so this will be tracked to your vendors.
- Hit OK when done.
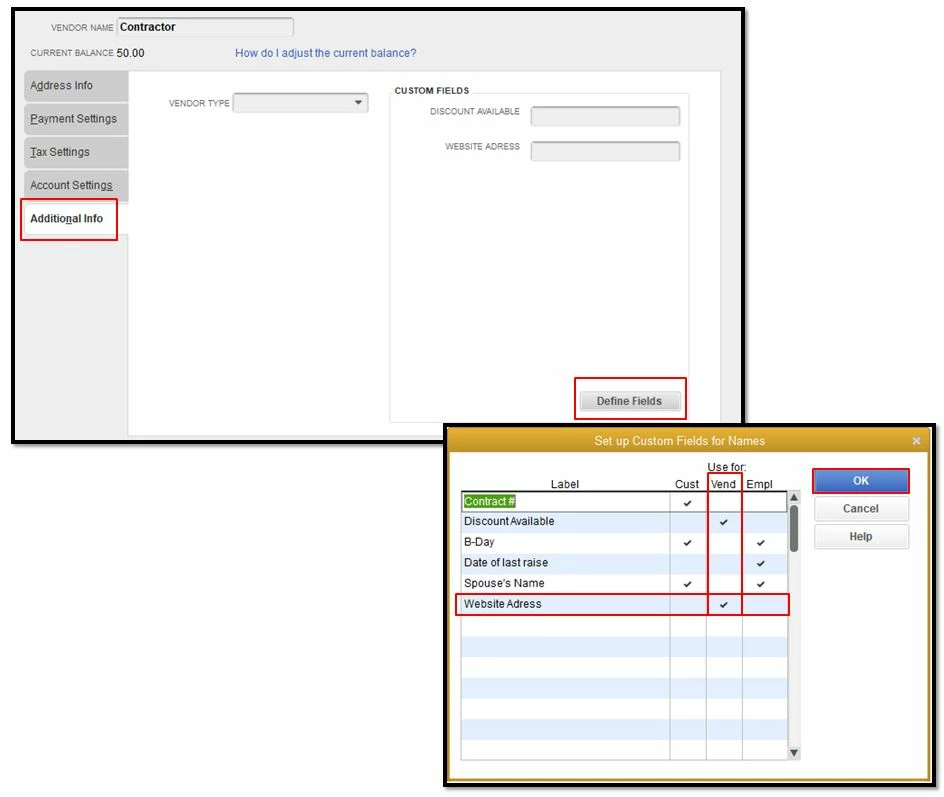
Check it here for more details: Create and use custom fields in QuickBooks Desktop.
Then, here's how to add the Website Address column on the Add/Edit Multiple List Entries page for your vendors:
- Go to the Lists tab and select Add/Edit Multiple List Entries.
- Choose Vendors from the Lists drop-down arrow.
- Click the Customize column button.
- Browse the Available Columns box to find the added Website Address column.
- Hit Add to add it to the Chose Columns section.
- When finished, tick OK.
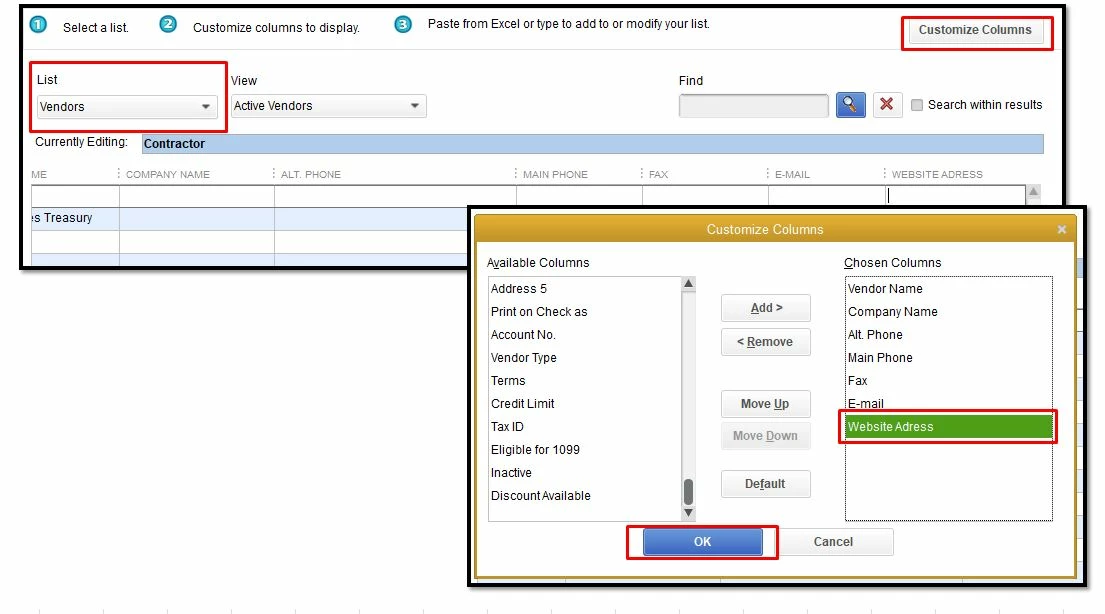
- You can now input the appropriate info of your vendors under the Website Address column.
- When everything is set, click Save changes.
For your reference, here's the link that you can open: Add and edit multiple customers, vendors, and items.
Also, QuickBooks has a variety of vendor reports that you can open to see your expenses and accounts payables. To get started, head to the Vendor reports page at this link.
Let me know if you need further assistance with managing your vendor's list entries. I'm always around to help. Have a good one.

