Thanks for the screenshot, @AirandVac.
I'll help you get rid of the shaded rows on your printed forms.
You'll have to configure the printer settings to remove those dark gray colored rows on your forms. I can walk you through the steps how:
- Go to the File menu, and then choose Printer Forms.
- Select the form you want, and then click OK.
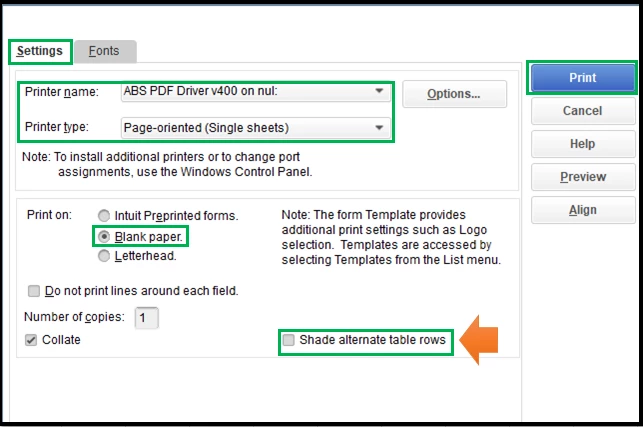
- On the Settings tab, choose Blank Paper, and the Printer name and type.
- Untick the Shade alternate table rows checkbox.
- Click Print when you're ready.
If the issue persists, you can run our PDF and printing repair tool to fix it.
You'll want to customize your forms to personalize their details. Also, we've collated a handy article that lists the new features in QuickBooks Desktop Enterprise 2021.
Let me know in the comment section if you need more printing tips in QuickBooks. I'm always around to back you up.
