Hi there, @SB8.
You have to create a Bill transaction so that you can see a transaction in the Pay bills page. Then create a Journal Entry (JE) for the vendor credit that will be applied to the Bill transaction that you've created. I'll guide you through the steps on how to do that, I added screenshots too after every process as a reference.
Please take note that the accounts used in this example is only for clarification purposes. We aren't able to advise as to which specific account you should apply the transactions. I suggest doing this with your accountant to avoid messing up your books in the future.
Here's how:
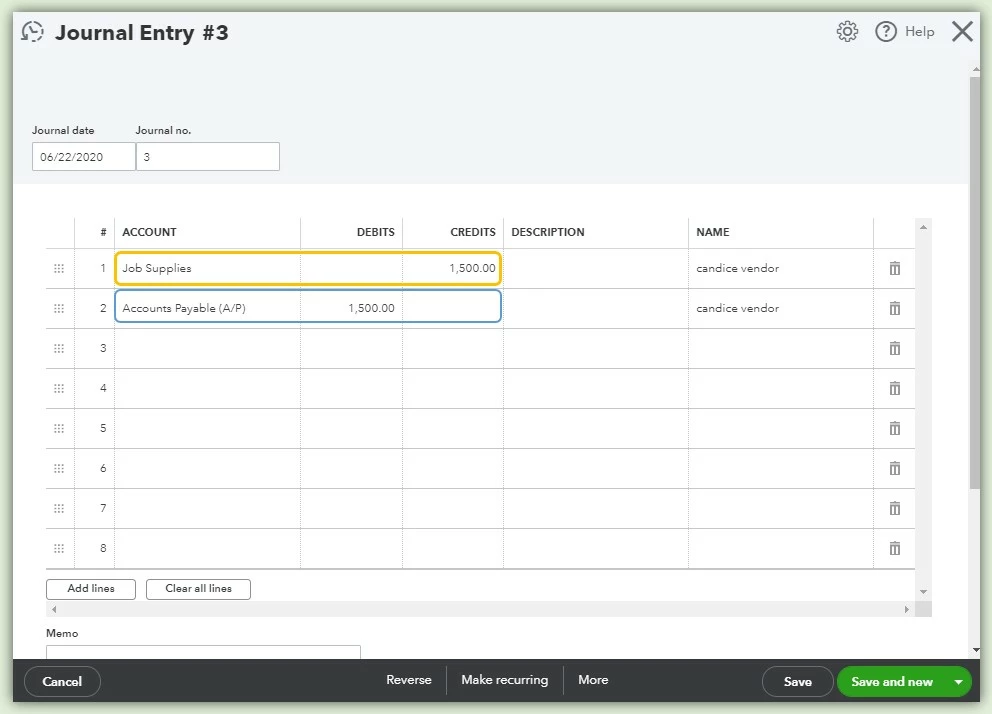
Step 1: Create a Journal Entry transaction
- Go to the + New button and select Journal Entry.
- In the first line item, I use the Job Supplies account and entered the amount under the Credits column.
- In the second line item, I use the Accounts Payable account and entered the amount under the Debits column.
- Enter the Vendor's name.
- Verify and select the Save button. (Here's how it looks like).
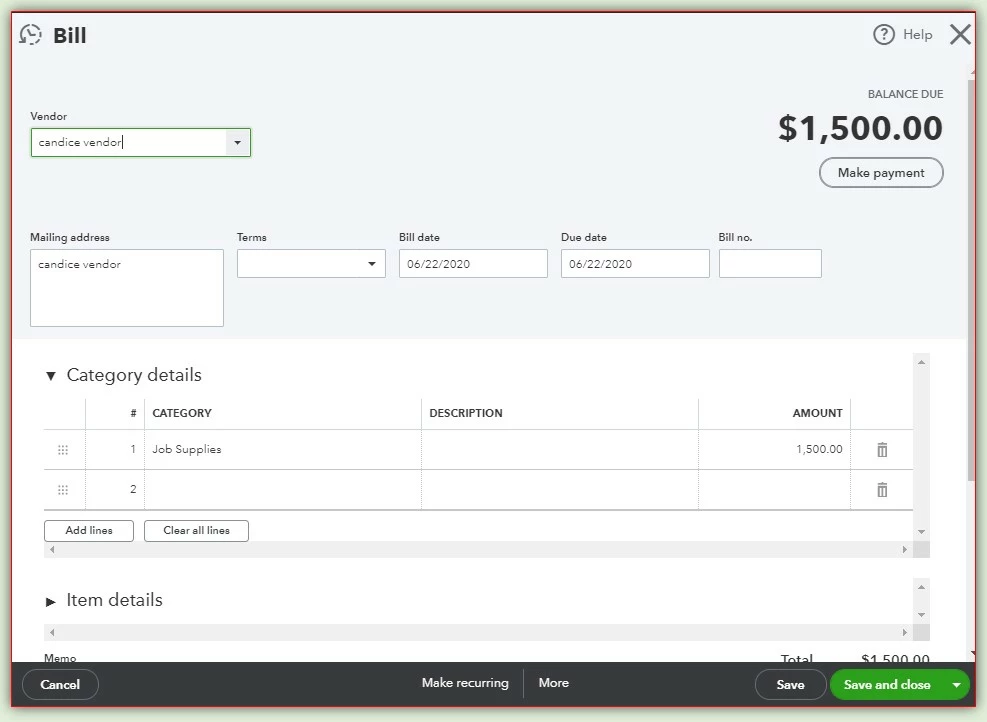
Step 2: Create a Bill transaction
- Go to the + New button and select Bill under the Vendor column.
- Enter the name of the vendor, category or the item details, the date and the amount.
- Verify the details and click Save and close. (Please see attached screenshot below).
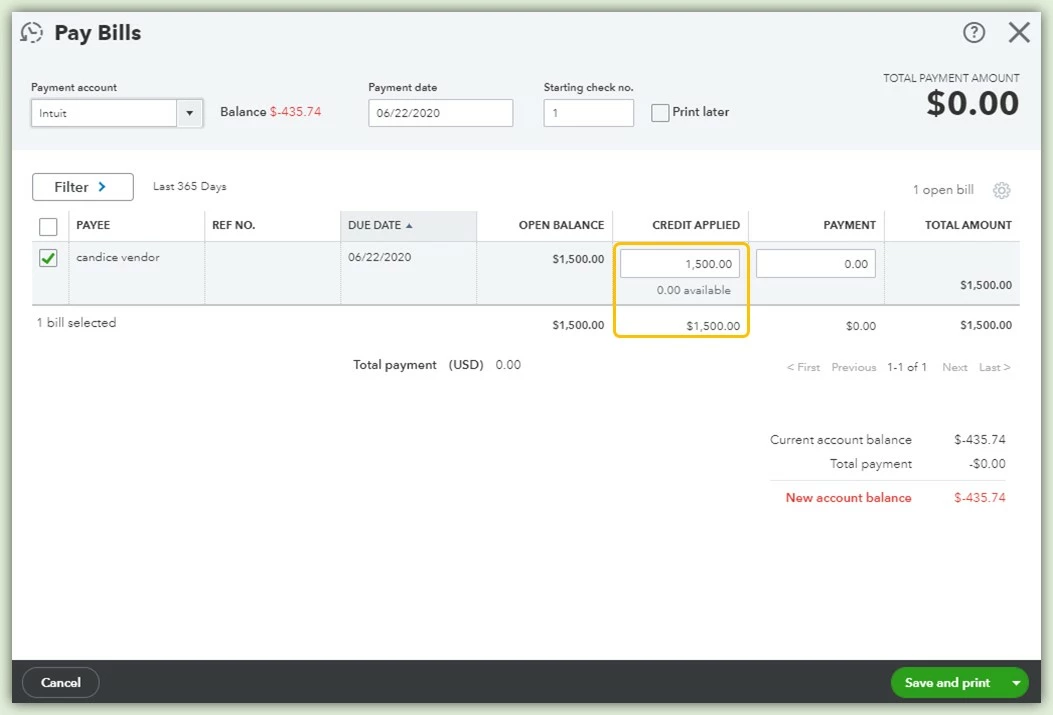
Step 3: Create a Pay Bill transaction (This is done to link the Vendor credit via JE and Bill transaction)
- Go to the + New button and select Pay bills under the vendor column.
- Tick the box of the Bill transaction, with the vendor credit from the JE you've created under the Credit applied column.
- Click in the Credit applied box to see the vendor credit you've added and enter the amount of the Bill.
- Verify and then select Save and close.
To see the transactions you've made with your vendor, you can run a Transaction List by Vendor report then customize it to see the essential variables of your report.
You can also memorize the customized report so that you'll no longer do the same process in customizing your report. Here's an article that shows the steps on how to do that: Memorize reports in QuickBooks Online.
Please don't hesitate to comment below if you need anything else. I'll be here to help you. Stay safe out there and have a good one!
