Solved
Mark-up amount showing on invoices
My mark-up amounts are showing on my invoices to customers and of course I don't want that. How do I change that?

My mark-up amounts are showing on my invoices to customers and of course I don't want that. How do I change that?
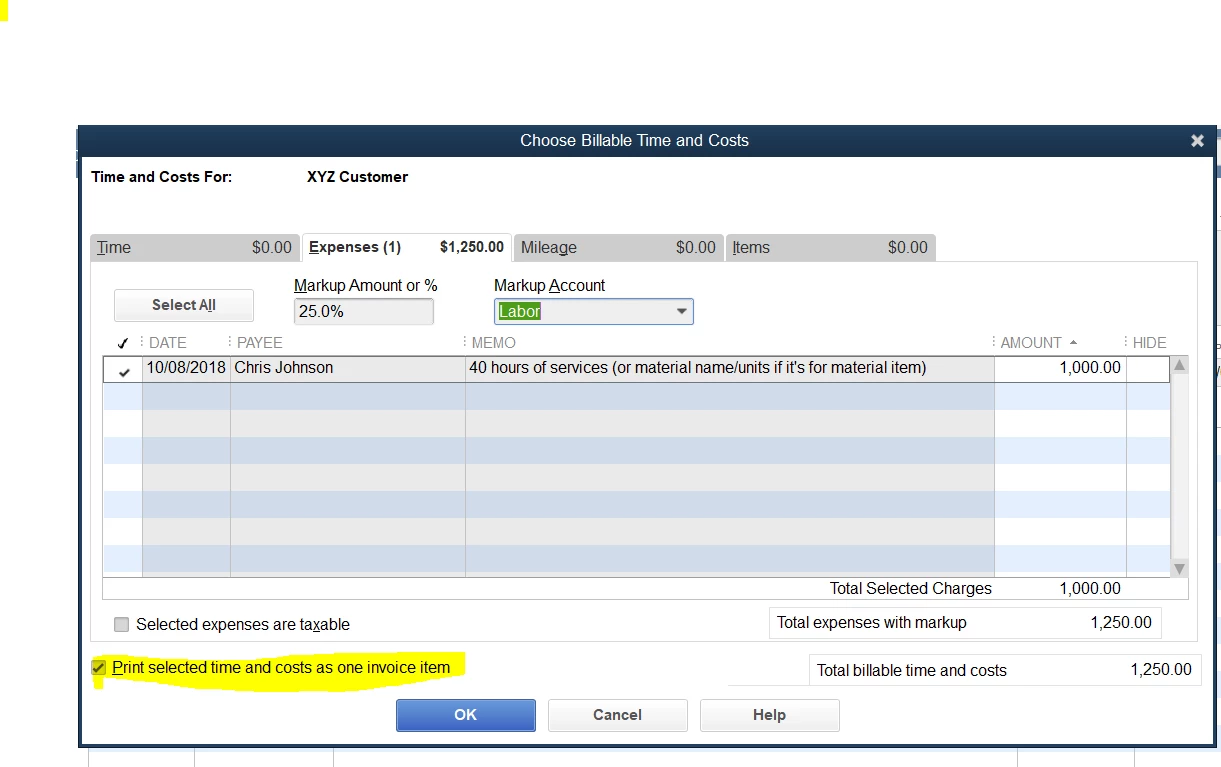
To hide MarkUp on Invoice, you will need to select box "Print selected time and costs as invoice item" at the bottom. See attached screenshot below for reference.
Also, copy "25lb. of ... T-shirt" description and paste it to the "Total Reimbursable Expenses" description line. That way you will see the Product name description on the Invoice.
.
Enter your E-mail address. We'll send you an e-mail with instructions to reset your password.