Good day to you, michael53,
I'm here to help you're able to show the date range to your customer using the invoice in QuickBooks Online (QBO).
If you're referring to enter the period in the Service Date section, QBO will only allow you to enter a single date.
You can use the Description field instead as it has a maximum number of 4000 characters. Thus, you can add information as many as you want.
On the other hand, QuickBooks lets you add a custom field that matters most to your customers. To set it up on the sales form:
- Go to Settings ⚙️, then choose Account and Settings.
- Click Sales, then go to the Sales form content section.
- Select the pencil icon in that section.
- Enter a name into the dialogue box beneath the heading Custom fields.
- Select whether you want the field to be internal (only displayed in QuickBooks), or public (displayed in QuickBooks and displayed/printed on sales forms).
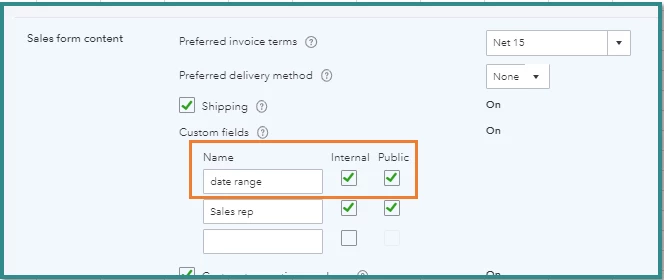
- Click Save, then Done.
- These fields will now appear on your sales forms.
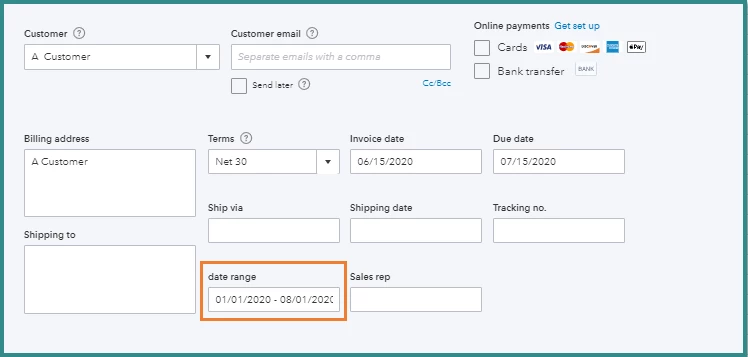
I will also appreciate it if you can provide a screenshot of the field you've customised. This way, I'll be able to know how exactly the period looks like on your end.
Here's an article to help you personalise your sales forms: Customise invoices, estimates, and sales receipts in QuickBooks Online.
Stay in touch if there's anything else I can help you today. Just mention my name and I'm glad to help.
