Hi there, Barmik01.
Let me provide insights on how the Class feature works in QuickBooks Online so you can manage it in the program smoothly. I'll also ensure the discount shows up in the Class column each time you run the Profit and Loss by Class report.
Please know that when you choose One to each row in transaction in the Categories section and add the discount in the Discount field on the Invoice page, assigning a class to it is currently unavailable.
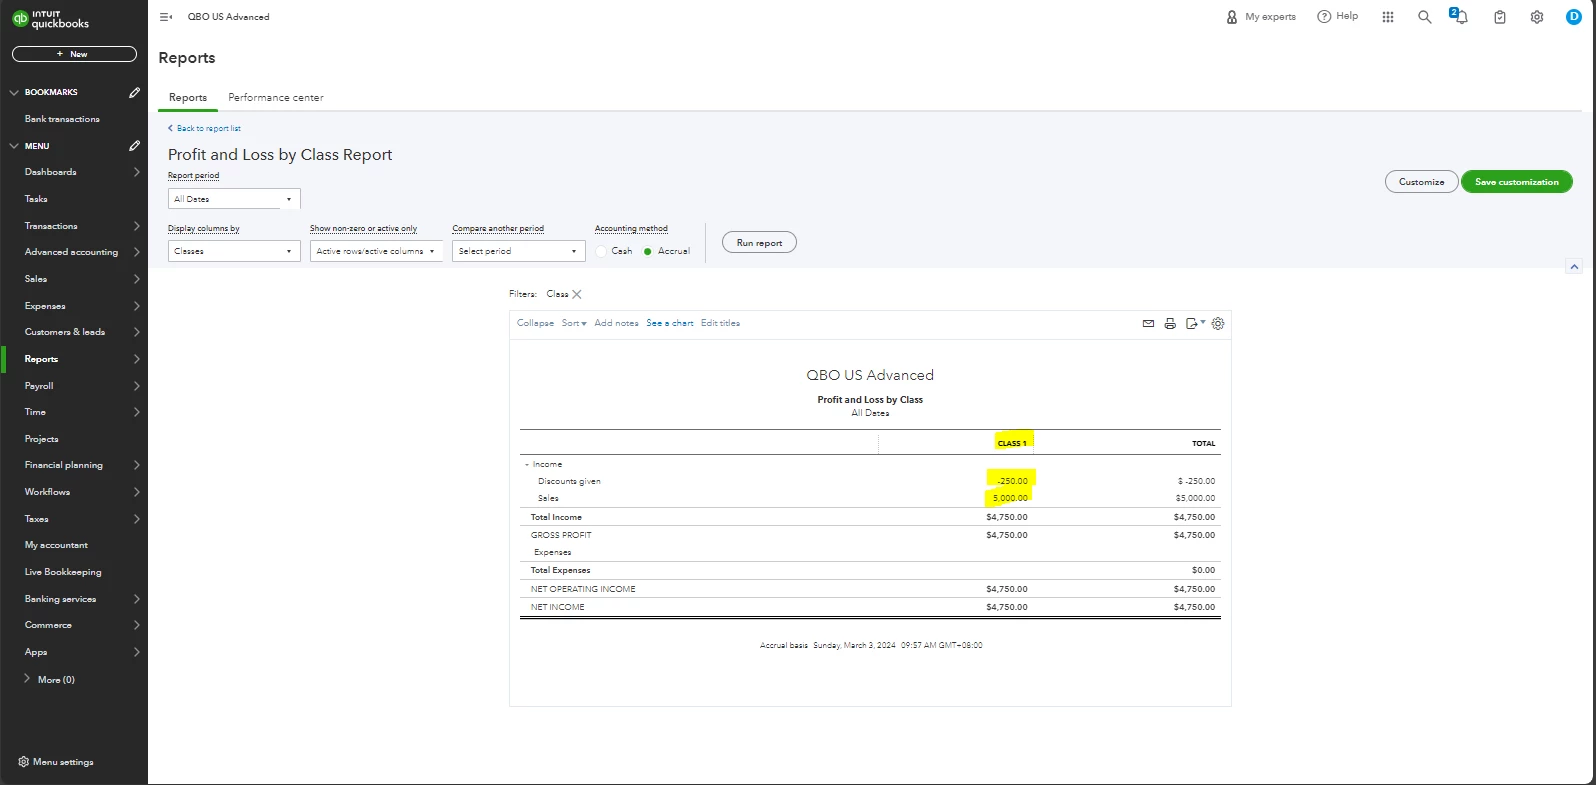
Furthermore, once a discount is added to your invoice as a line item, you can apply a particular class to it. However, the discount amount and allocated class appear as separate columns in the Profit and Loss by Class report.
I recommend setting the class to One for the entire transaction so that you can choose a specific class for the invoice. This way, the class is applied to the full transaction and discount amount. They'll then appear as a single column in the report.
Here's how:
- Click the Gear icon ⚙ and select Account and settings.
- Choose Advanced, then select the Categories section to edit.
- Under Assign classes, select One to entire transaction.
- Click Save, then Done.
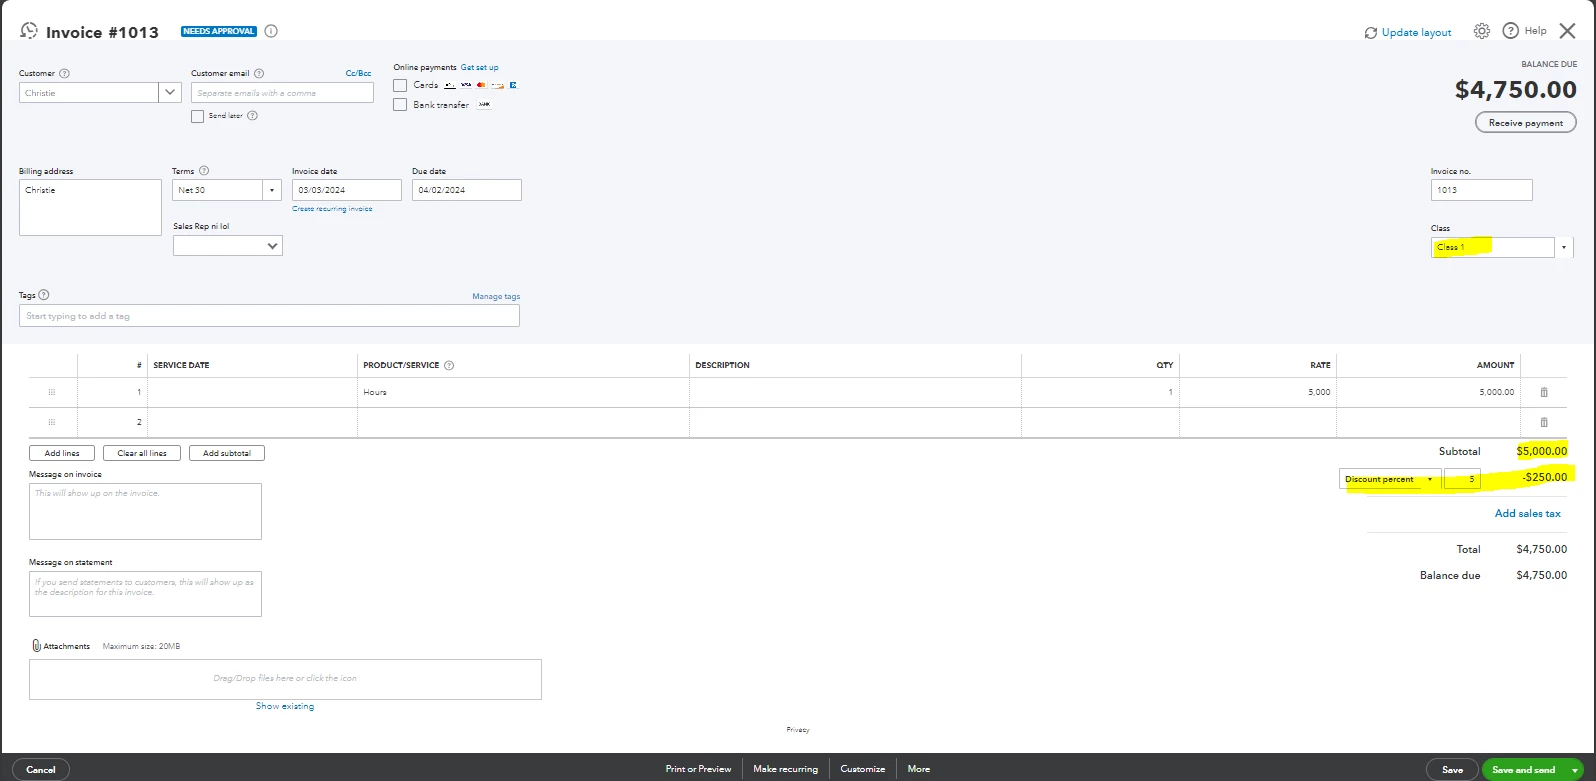
Once completed, choose the desired class in the Class box and enter the discount amount. I've included a screenshot below for visual reference.
After that, you'll now be able to run the mentioned report including the discount in the Class column.
In case you need steps on how to edit or delete a class within the program, you can read this article: Create and manage classes in QuickBooks Online.
Feel free to add a comment below if you have other concerns about assigning classes in QBO. I'm always here to help you further, Barmik01. Have a great day!
