October 19, 2021
Solved

My bill approval workflow works when I create a bill from the Expenses page but does not work when I create a bill from the Transactions - Receipts page, is there a fix?

  • October 19, 2021
  • 1 reply
  • 0 views
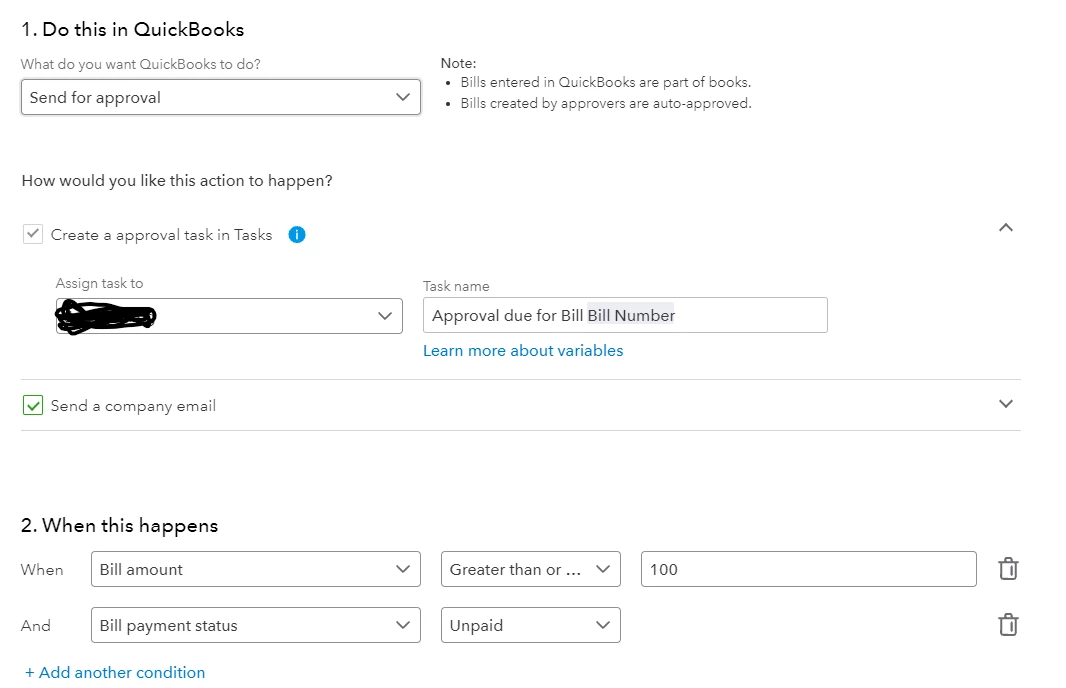
The workflow requires a bill to be approved when over $100 and works correctly when a bill is created from the Expenses pages but when a bill is added via the Receipts page using Create Bill, the approval is not required for that bill even when over $100. How do I get the workflow to apply on the Receipts page?
Best answer by Maybelle_S

Hi,


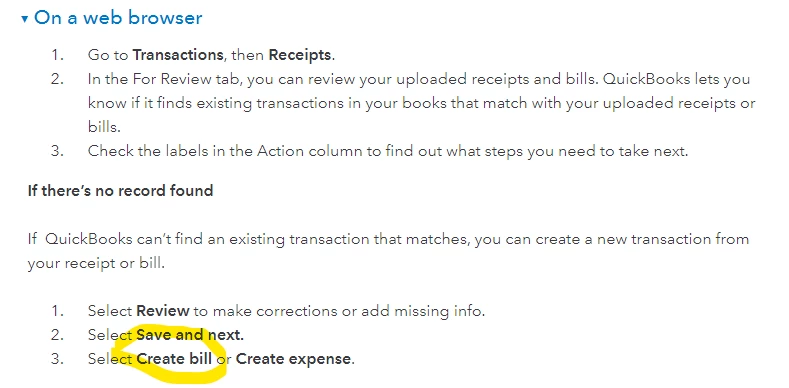
I'm using the following standard QBO method to create the bill: https://quickbooks.intuit.com/learn-support/en-us/bank-transactions/manage-your-receipts-in-the-receipts-tab/00/243895 which has been around in QBO for a while now.  The issue is when I select "Create bill", the workflow for bill approval is not invoked:
Here's the Workflow which works when creating Bills using other methods:


When will the Workflows functionality be updated to work when bills are created on the Transactions - Receipts page?


Hello there, @debbie131.


We aren't able to provide the timeframe of when this feature will be released. At times, we roll out updates based on the requests that we received from our customers.


Our engineers make improvements in QuickBooks Online by listening to our customers' suggestions and comments, so I'll be sure to take note of it. You can also send your feedback by going to the Gear icon of your account and clicking on Feedback. Check this link for more information on how to submit feedback: How do I submit feedback?


In case you need it, I'm also adding these articles that will help you more about the Workflow feature in QBO:


• Use workflows to send reminders

• Create custom workflows in QuickBooks Online Advanced


Leave a comment on this thread if you still have questions or if you need further assistance. I'd be glad to answer them for you.


1 reply

MariaSoledadG
October 19, 2021

Allow me to provide some information about the workflow and guide you on what to do, debbie131.


For now, since the Receipts page is a newly added feature, it doesn't follow the same workflow when creating a bill from the Expenses page. As a workaround, you can manually attach the receipt to your bill. I've added a screenshot for your reference so you'll be guided visually:


Please check this article for more information: Enter Bills And Record Bill Payments In QuickBooks Online. In addition, once you enter a bill payment, QuickBooks downloads the latest transactions automatically. You can check out this article for your reference: Categorize And Match Online Bank Transactions In QuickBooks Online


Keep me posted if you need further assistance about creating a bill and its' workflow. I'll be right here to help you. 

debbie131Author
October 21, 2021

Thanks for the reply.  I do know how to add an attachment when creating a bill manually but was wanting to take advantage of the receipt/bill scan and extract to quickly create bills without doing all the manual steps.  Can you let me know when Workflows will work on the Receipts - Create Bill functionality?

October 21, 2021

Hello there, debbie131.


I'd like to share what I know about the Bill functionalities in QuickBooks Online.


After the bill is created, it will always post directly to your books. But since the receipt won't follow the workflow for the bills functionality. You can attach the receipt while creating the bill. This way, you can easily match the bill payment by checking the attachment you added.

I've added this article with the video tutorial in adding an attachment for Bills and Expense: How to Attach Documents To Transactions: Bills & Expenses.


I also suggest consulting an accountant for the best way to pay your bills or handle other vendor transactions. You can provide this link as their reference: Expenses and vendors.


Get back to us if you still have other questions about bills in QuickBooks Online. We are always here to help. Have a  nice day!